How to add an event to the Event Calendar
This feature creates an interactive calendar on your website for your site visitors to check on upcoming events, meetings, fundraisers, and more.
1. Click on the "Events" tab in your WordPress admin and click the "Add New".
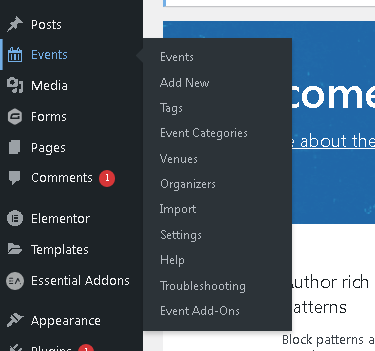
2. On the Add New Event page, use the "Add Title" field and use the text box to add title and description to your event.
1. Click on the "Events" tab in your WordPress admin and click the "Add New".
2. On the Add New Event page, use the "Add Title" field and use the text box to add title and description to your event.
3. Enter the Time and Date of the event.

The Start/End – this is simply when the event starts and finishes. Clicking into either date field will pop up a date picker, where you may select your desired dates from a calendar. Event start and end times may be selected from a drop-down menu, or you may enter your dates and times manually if you prefer. If you already checked the All Day Event box you will not be able to specify a time for your event
The All Day Event checkbox is useful when the event is taking place on a particular date (or dates) – but you don’t really know when, or else feel that it is good enough to say it takes place “all day” without being more specific
4. Enter the Event venue/location.
5. Enter the Organizer's contact details..

You can add multiple organizers to an event.
6. Enter the event's website in the URL field.
This is particularly useful if you are showcasing events organized by external organizations and they have a dedicated event website.
7. Enter the Event cost.
If you don’t provide a cost, then no cost details will be shown to visitors. If the event is actually free then simply provide a cost of 0 (zero).